


1 inch Underlay, a Random 6×20 Pattern, and the VersaBond LFT Spec in South Edmonton
South Edmonton covers an enormous swath of the city south of Whitemud Drive, with a housing stock that runs from established 1970s and 1980s communities through 2010s and 2020s new builds at the city’s outer edge. Floor tile renovations across this area arrive with one consistent prep requirement that an experienced setter will not compromise on: a full inch of plywood underlay glued and screwed under any new floor tile that goes over a wood-framed subfloor. On this south-Edmonton renovation The Tile Experts ran exactly that prep discipline before the tile went down: glue and screw a layer of plywood across the install area to meet the 1 inch total underlay requirement, then install a 6 by 20 tile in a random pattern with VersaBond LFT and finish every joint with Prism Grout.

Why We Require 1 inch of Underlay Under Every Floor Tile
The substrate prep on this south-Edmonton install started with a glue-and-screw plywood underlay that brought the total underlay thickness under the new tile to 1 inch. The requirement: we require a full inch of underlay under all floor tile installations over a wood-framed subfloor. The engineering reason: a wood-framed floor flexes under load, and a tile bonded to a flexing substrate will eventually pop, crack, or open at the joints. The thicker the underlay layer, the stiffer the substrate becomes, and the less of that flex reaches the tile face. One inch is the threshold thickness where the substrate becomes stiff enough that normal residential live load does not transfer measurably to the tile bond. The execution: the existing subfloor was inspected for the underlay thickness already in place, the deficit was calculated, and additional plywood was glued and screwed across the install area to reach the 1 inch target. Why glue plus screws: screws alone leave gaps between the underlay and the subfloor that act as flex zones; glue plus screws creates a continuous mechanical bond that performs as one stiff plate. The result: a substrate that does not transfer flex to the tile bond, which is the prep discipline that prevents the most common future tile failure mode.
The Taped-Around Install Zone and the Demolition Reality
On this south-Edmonton job the install area was already taped around when our crew arrived, which is a common scenario where the homeowner or a previous trade has marked the renovation scope before the tile crew is engaged. What this changes: the install scope is defined geographically before the substrate is fully understood, and the tile setter has to verify that the marked area actually has the substrate to receive the new tile. What we found: the existing substrate did not have enough underlay to meet our 1 inch requirement, which meant the prep scope grew from a paint-and-prep job to a glue-and-screw plywood install across the entire tile area. The right way to communicate this to the homeowner: the moment the prep deficit is identified, the cost and time impact of the additional underlay scope gets quoted before any work continues. Surprises at invoice are the fastest way to damage a homeowner relationship, and the transparent prep scope conversation is what protects both the homeowner’s budget and the install’s quality.

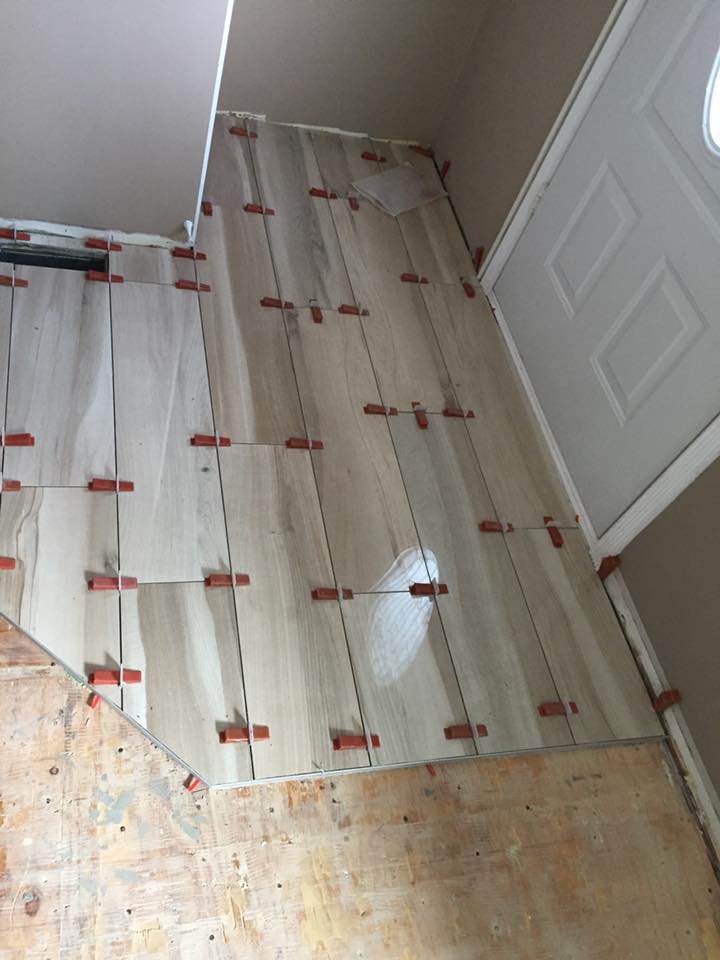
The 6×20 Tile in a Random Pattern
With the substrate brought up to 1 inch of glued-and-screwed underlay, the floor was tiled with a 6 by 20 porcelain in a random pattern, set with VersaBond LFT Mortar. Purpose of the format: a 6 by 20 is the elongated plank format that has become one of the most popular residential floor tile sizes of the last decade. The narrow face and long length reference hardwood plank flooring without bringing wood’s maintenance and moisture sensitivity into the room. Purpose of the random pattern: on a plank-format tile, a random offset pattern (rather than a fixed 50/50 or 70/30 stagger) reads as more natural and less mechanical, mimicking the joint randomness of a real hardwood floor. Property: VersaBond LFT is the large-format-tile version of VersaBond, with a smoother application profile and an extended open time specifically engineered for tiles in the plank and large-format size range. The LFT chemistry maintains its bond coat thickness under a 6 by 20 face better than standard VersaBond, which is the property that supports a lippage-free random plank install. Relationship: the chemistry pairing (VersaBond LFT under a 6 by 20 plank over 1 inch of glued-and-screwed underlay) is the manufacturer-correct specification for this assembly.
Prism Grout on Every Joint
Every joint in the new floor was finished with Prism Grout. Property: Prism is a high-performance, stain-resistant calcium-aluminate cement grout that cures harder than standard portland-cement grout, holds its colour reading across years of use, and resists efflorescence across the moisture cycling of a residential floor. Why grout chemistry matters on a 6 by 20 plank install: the joint network on a plank-format floor is more visible per square foot than on a square-format tile because the elongated tile face creates longer continuous joints. A grout that holds its colour and resists staining is the property that keeps the install reading as designed for a decade rather than for a season. The grout colour decision: on a random plank pattern the grout colour was matched to recede into the tile face so the random joint pattern stays subtle rather than busy.
Planning a plank-format floor tile install with proper underlay prep in south Edmonton or anywhere in the capital region? Call The Tile Experts at 587-333-9800 or request a quote.
South Edmonton Floor Tile FAQ
How much does a 6×20 plank tile floor install cost in south Edmonton?
For a project of this scope (substrate inspection and 1 inch glued-and-screwed plywood underlay where required, 6 by 20 plank-format porcelain in a random pattern with VersaBond LFT, full Prism grout finish), plan on 3,800 to 7,800 dollars in tile-scope labour and material, depending on floor square footage and the extent of underlay deficit prep.
Why require a full inch of plywood underlay under floor tile?
A wood-framed floor flexes under load, and a tile bonded to a flexing substrate will eventually pop or crack. One inch of underlay is the threshold thickness where the substrate becomes stiff enough that normal residential live load does not transfer measurably to the tile bond. Glue plus screws (rather than screws alone) is what makes the underlay perform as one continuous stiff plate.
Why use VersaBond LFT on a 6×20 plank tile?
VersaBond LFT is engineered for large-format and plank-format tile. The smoother application profile and extended open time maintain the bond coat thickness under a 6 by 20 face better than standard VersaBond, which is the chemistry property that supports a lippage-free plank install. See our floor tile installation service.
Tile Installation in South Edmonton
South Edmonton covers the residential band south of Whitemud Drive, with neighbours in Heritage Valley, Magrath Heights, Twin Brooks, Ellerslie, Walker, and the southern edges of Riverbend and Terwillegar. Plank-format floor installs, underlay-prep-heavy renovations, 6 by 20 random pattern work, and substrate-discipline projects on wood-framed subfloors are some of the most common projects in this broad south-side housing stock. The Tile Experts install bathrooms, kitchens, floors, custom showers, fireplaces, and feature walls across all of south Edmonton, plus the full capital region. Contact us or call 587-333-9800 for a free in-home walkthrough.
More Projects in South and the Edmonton Area
Explore more recent tile installation work by The Tile Experts.
