


Casing Undercuts, Half-Tile Layout Discipline, and a 12×12 Straight Lay in Hudson
Hudson is a north-Edmonton neighbourhood sitting east of 97 Street and north of 167 Avenue, with a housing stock built largely through the 2000s. Bathroom floors in this stock arrive at renovation age in their first replacement cycle, where the original builder-grade tile is showing its years and the homeowner wants a refresh that addresses both the look and the install quality. On this Hudson bathroom floor renovation The Tile Experts ran the install with the layout discipline that separates a custom tile job from a builder-grade one: every door casing was undercut to receive the tile underneath rather than against, the room was measured both vertically and horizontally to find a layout where no cut tile would be smaller than half the tile face, and the 12 by 12 floor was set in a straight lay with VersaBond and finished with Prism Grout.
Why Every Casing Gets Undercut Before a Floor Tile Install
The first move on any custom floor tile install is to undercut every door casing in the room so the tile slides underneath the casing rather than being cut to fit around it. The conventional builder approach: cut every tile around the casing profile, which leaves a visible irregular gap that has to be caulked. The custom approach: use an undercut saw to trim the bottom of the casing to the exact height of the tile plus the bond coat, so the tile slides cleanly underneath and the casing appears to grow out of the tile. Why this matters: the undercut detail is the single most visible difference between a high-end tile install and a basic one. A homeowner walking into a bathroom does not consciously notice that the casings are undercut, but they immediately register the absence of irregular caulked seams around every door, every closet, and every wall transition. The execution discipline: the undercut depth has to be measured to the tile thickness plus the bond coat thickness, which is a number the setter calculates from the actual tile spec before the first cut.
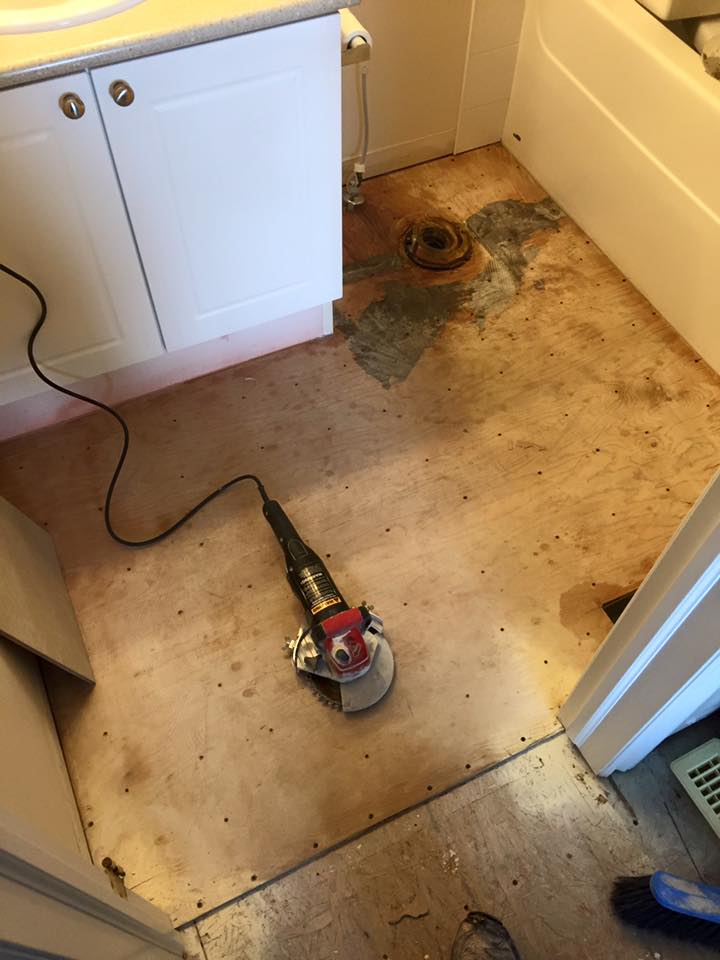
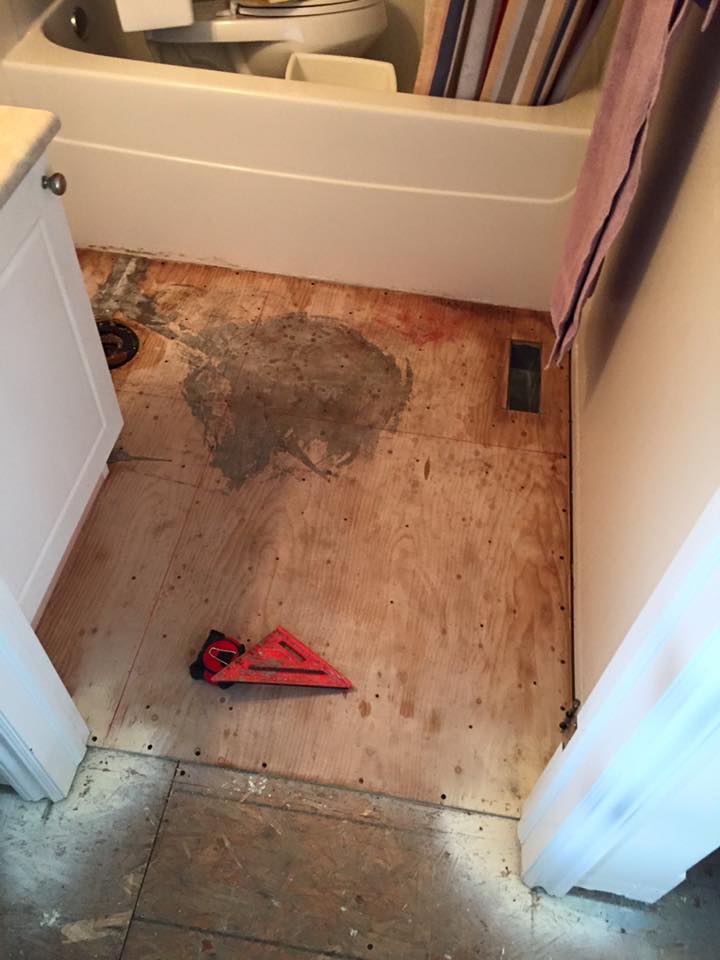
Measuring Vertically and Horizontally to Find the Right Layout
Before any bond coat goes on the floor, the setter measures the room in both directions and dry-fits the tile to find the layout that produces the cleanest cuts at the perimeter. The rule we install to: no cut tile smaller than half the size of the tile being used. Why this rule matters: a thin sliver of cut tile at the perimeter (a 2 inch piece against a 12 inch wall, for example) reads as a layout mistake even when it is the geometric reality of the room. The eye registers narrow perimeter pieces as something gone wrong. A perimeter cut that is at least half the tile face reads as a deliberate, balanced layout decision. How the rule shapes the install: the setter calculates the perimeter cut size in both directions before committing to a starting tile location, then shifts the field so the perimeter cuts on both ends of both dimensions are roughly equal and at least half the tile face. The benefit to the homeowner: a bathroom floor that reads as balanced and proportional rather than as something tiled tightly to a wall on one side and sloppily on the other.
The 12×12 in a Straight Lay With VersaBond
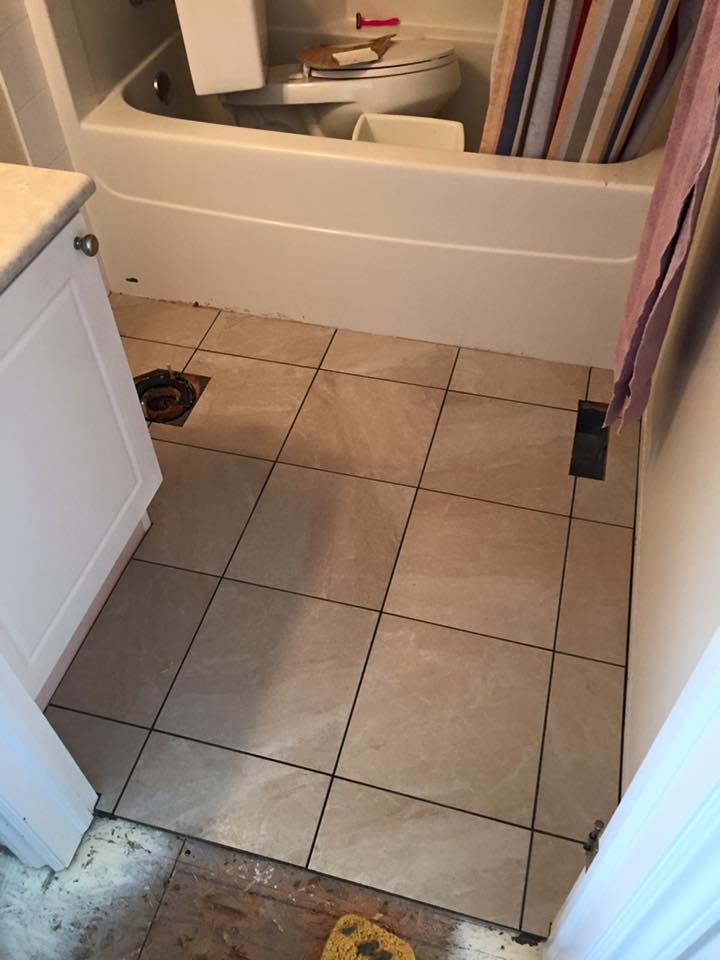
With the casings undercut and the layout dry-fit to the half-tile rule, the floor was tiled with a 12 by 12 porcelain in a straight lay, set with VersaBond Mortar. Purpose of the format: a 12 by 12 is the timeless residential floor tile size. Smaller than the contemporary 24 by 24 large-format, larger than the 8 by 8 of an earlier era, the 12 by 12 reads as appropriate for any residential bathroom across any era of housing stock. Purpose of the straight lay: a straight lay (every joint aligned with the joint of the adjacent course) gives the room a clean, calm grid that does not compete with the rest of the bathroom’s design. On a refresh renovation where the homeowner wants the floor to read as updated but not as a statement, the straight lay is the right call. Property: VersaBond is a polymer-modified professional-grade thinset rated for ceramic and porcelain over wood-framed subfloors, with the flexibility to absorb the seasonal movement that any Edmonton bathroom floor lives through.
Prism Grout on Every Joint
Every joint in the floor was finished with Prism Grout. Property: Prism is a high-performance, stain-resistant calcium-aluminate cement grout that cures harder than standard portland-cement grout, resists efflorescence across bathroom moisture cycling, and holds its colour reading across years of use. Why grout chemistry matters on a bathroom floor: the joint network is the most exposed surface of the floor, and a substandard grout will absorb water, stain, and lose its colour within a couple of seasons. Prism’s chemistry produces a joint that performs across the moisture cycling of a daily-use bathroom. The grout colour decision: on a 12 by 12 straight lay where the design intent is a calm grid, the grout colour was matched to recede into the tile face so the joints support the layout reading rather than fighting it.
Planning a custom bathroom floor renovation in Hudson or anywhere in north Edmonton? Call The Tile Experts at 587-333-9800 or request a quote.
Hudson Bathroom Floor FAQ
How much does a 12×12 bathroom floor tile renovation cost in Hudson?
For a project of this scope (door casing undercuts, half-tile layout dry fit in both directions, 12 by 12 porcelain in a straight lay with VersaBond, full Prism grout finish), plan on 1,800 to 3,800 dollars in tile-scope labour and material, depending on bathroom square footage and the number of door casings and wall transitions.
What does it mean to undercut a door casing?
Undercutting means trimming the bottom of the door casing (with a specialty undercut saw) to the exact height of the tile plus the bond coat, so the tile slides underneath the casing rather than being cut around it. The result is a clean, professional reveal where the casing appears to grow out of the tile.
Why avoid cut tile smaller than half the tile size at the perimeter?
Narrow perimeter cuts read as a layout mistake to the eye, even when the room dimensions force them. By measuring the room in both directions before starting and shifting the field so perimeter cuts on both ends are at least half the tile face, the install reads as a balanced, deliberate composition. See our floor tile installation service.
Tile Installation in Hudson and North Edmonton
Hudson sits east of 97 Street and north of 167 Avenue, with neighbours in Schonsee, McConachie, Crystallina Nera, and Klarvatten. Custom bathroom floor renovations, 12 by 12 porcelain installs, casing-undercut layout work, and refresh-cycle tile projects are some of the most common projects in this 2000s housing stock. The Tile Experts install bathrooms, kitchens, floors, custom showers, fireplaces, and feature walls across Hudson, Schonsee, McConachie, Klarvatten, and the rest of north Edmonton, plus the full capital region. Contact us or call 587-333-9800 for a free in-home walkthrough.
More Projects in Hudson and the Edmonton Area
Explore more recent tile installation work by The Tile Experts.
